Introduction: Nail Drills Are Everywhere—But Are They Safe?
The Short Answer: Are Electric Nail Files Safe? Yes, electric nail drills are entirely safe for natural nails when used with proper training, low speed settings, and the correct drill bits. The damage often associated with nail drills is not caused by the machine itself, but by user error—specifically applying too much pressure, using aggressive bits on the natural nail plate, or drilling at excessively high speeds.
Nail drills, or electric nail files, have transformed how we do manicures and pedicures, both at salons and at home. They make shaping, buffing, and removing enhancements like gel or acrylics faster and easier. But with great power comes a big question: Are nail drills safe for natural nails?
The concern is real—used improperly, nail drills can absolutely cause damage. In this guide, we'll break down the real risks (and rewards) of nail drills, and show you practical ways to enjoy beautiful nails without sacrificing their health.
As a leading supplier of professional nail drill micromotors, we've seen firsthand how the right equipment paired with proper technique makes all the difference.
Understanding the Basics: How Nail Drills Work—and the Types You’ll See
Before diving into technique, it’s important to understand how nail drills operate and the types available.
How Nail Drills Work
A nail drill uses an electric motor to spin interchangeable bits at adjustable speeds. These bits, made from materials like carbide, diamond, or ceramic, come in various shapes and grits for different jobs: shaping free edges, removing products, smoothing surfaces, and refining cuticles.
Speed and direction are adjustable, giving you fine control for precise nail care.
The Different Types of Nail Drills
Portable (Handheld) Drills:
Compact and lightweight, these are favorites for personal use or mobile techs. They usually have adjustable speed settings and basic bits for everyday needs.
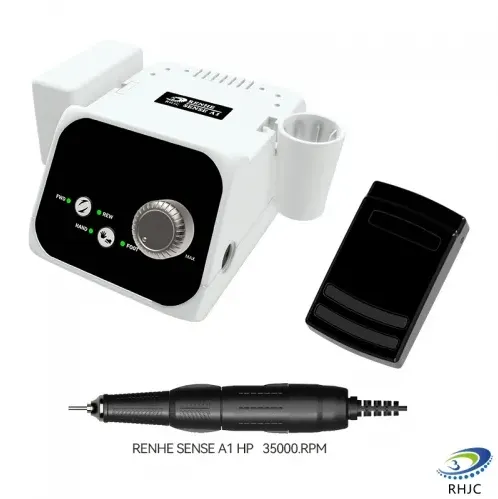
Desktop (Professional) Drills:
Salon-grade models offer more power, higher torque, and a broader speed range. High-performance models (like the professional micromotors we supply at RHJC) come with ergonomic handpieces and foot pedals for hands-free control—perfect for frequent or long sessions.
Corded vs. Cordless Models:
Corded drills deliver steady power, ideal for extended use. Cordless options offer flexibility and freedom of movement, powered by rechargeable batteries. Your choice depends on how and where you’ll be using it.
Are Nail Drills Safe? A Realistic Look at the Risks—and Rewards
So, are they safe? The honest answer: Yes, with proper technique. No, with poor technique.
Let’s break it down.
How Nail Drills Help When Used Correctly
- Precise shaping: Nail drills can shape nails cleanly, without tearing like rough manual filing sometimes does.
- Smooth finishes: A quality buff with the right bit leaves nails smooth and polish-ready.
- Efficient removal: Removing gel, acrylics, and other enhancements is faster and less drying compared to chemical soaks.
- Cuticle care: Low-speed cuticle bits can gently clean and refine without damaging delicate tissue.
The Risks When Nail Drills Are Used Wrong
- Over-filing: Staying too long in one spot or using too much pressure thins the nail plate, making it brittle and weak.
- Heat Burns: Friction from high speeds can cause painful heat buildup, even burns.
- Grooves and ridges: Uneven pressure or wrong angles create visible surface damage.
- Onycholysis (nail separation): Aggressive drilling near the free edge can lift the nail plate.
- Infection: Dirty bits or trauma to skin around the nail can invite bacteria and fungi.
Bottom line: Nail drills are only as safe as the person using them. Skill, patience, and proper technique matter a lot.
How to Avoid Damaging Your Natural Nails
Want strong, beautiful nails without regrets? Follow these steps:
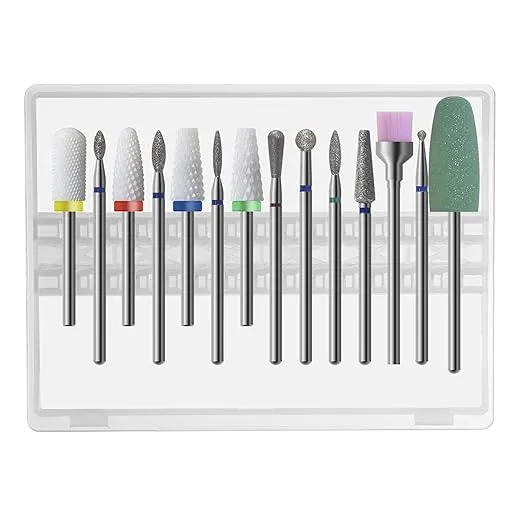
1. Choose the Right Drill Bits
Not all bits are made equal—or for the same job.
- Carbide Bits: Great for removing hard gels and acrylics. Use cautiously on natural nails—and only at low speeds.
- Diamond Bits: Versatile for shaping and cuticle work. Choose finer grits for natural nail work to avoid roughness.
- Ceramic Bits: A cooler option (literally)—they generate less heat. Good for people sensitive to friction.
- Buffing Bits (Sanding Bands): Used for smoothing and prepping nails. Always use fresh bands for each client (or each session at home).
- Cuticle Bits: Flame-shaped or ball-tipped for gentle cuticle cleaning. Always at the lowest speed possible!
2. Master Good Operating Techniques
Good technique is everything.
- Grip like a pen: Light, controlled, and steady.
- Work at the right angle: Keep the bit flat or slightly angled—never dig into the nail plate.
- Control your speed: Start slow and only speed up if needed. High speeds are for product removal, not natural nails.
- Use light pressure: Let the drill and the bit do the work. Heavy pressure = heat and damage.
- Mind your direction: Adjust the drill’s rotation for better control around different parts of the nail.
3. Prepare Properly Before Drilling
Good prep makes everything safer.
- Disinfect everything: Bits, handpiece, and nails must be clean before starting.
- Soften cuticles: Use cuticle softener and push back gently. Never cut live skin aggressively.
4. Care for Your Nails Afterward
Nail care doesn’t end with the final buff.
- Hydration: Apply cuticle oil or hand cream after drilling to combat dryness.
- Avoid harsh chemicals: Stay away from detergents or solvents that can strip nails immediately after drilling.
5. Follow Essential Precautions
Always, always:
- Skip damaged nails: Don’t drill on infected, cracked, or painfully thin nails.
- Maintain your tools: Clean and disinfect your drill and bits regularly.
- Read your manual: Every drill has specific maintenance and safety tips—know them.
- Practice first: Start slow on practice tips or on very low speeds until you get confident.
- Consider pro training: If you plan to use a drill often or professionally, formal training is a great investment.
Frequently Asked Questions (FAQ) About Nail Drill Safety
Can a nail drill cause permanent damage to the nail bed?
Extreme and repeated misuse, such as filing deeply into the natural nail bed (creating "rings of fire"), can cause severe damage that takes months to grow out. However, permanent damage is rare unless the nail matrix (the growth center) is severely traumatized.
What speed is safe for natural nails?
For natural nails, always operate at low speeds. 3,000 to 6,000 RPM is generally safe for gentle cuticle prep and light buffing. Never use high speeds directly on the natural nail plate.
Which drill bit is the safest for beginners?
Fine-grit sanding bands or soft ceramic bits are often recommended for beginners because they are less aggressive. However, even with safe bits, a light touch and continuous movement are essential to prevent heat spikes.
Conclusion: Nail Drills Are Safe—If You Respect the Process
With the right knowledge, techniques, and precautions, nail drills can safely deliver stunning results.
By picking the right tools, mastering technique, prepping correctly, and caring for your nails afterward, you can protect your natural nails and still enjoy everything nail drills offer.
As a dedicated supplier of premium nail drill micromotors, RHJC provides salons and professionals with equipment designed for precision, stability, and client safety. Whether you are upgrading your salon stations or looking for a reliable wholesale partner, explore our professional collection and contact our team for expert advice.